Choosing the best Endoscope Lens in 2026 requires more than chasing higher resolution. The right lens must match the procedure, camera system, light source, and sterilization workflow. A sharp image is useful. A usable image is better.
Rudolf Kingslake, a respected optical designer, wrote, “Optical design is the art of compromise.” This principle remains valuable for endoscope selection. A wide field of view can reveal more anatomy, but it may increase edge distortion. A longer working distance can improve handling, yet it may reduce brightness. Small lens diameters support access through narrow channels, but they can limit light transmission and image detail.
This guide examines the practical factors behind a reliable Endoscope Lens. It considers resolution, focal length, depth of field, viewing angle, optical coatings, color accuracy, and mechanical durability. Compatibility also matters. The lens must fit the endoscope body, camera mount, and intended imaging platform without unstable adapters.
Look closely at the details.
A 4K label does not guarantee a 4K clinical image. The sensor, illumination, cable quality, and lens alignment all affect performance. Supplier documentation should include measurable specifications, inspection records, cleaning guidance, and service support. Independent testing is preferable when available.
There is no perfect lens. Even experienced buyers can overvalue one impressive specification. A balanced choice usually performs better across real procedures, repeated cleaning cycles, and changing operating conditions. This article provides a clear framework for comparing options carefully, while recognizing that clinical requirements differ between specialties and facilities.
An endoscope lens is the small optical system at the tip of an endoscope. It gathers light and forms an image of internal surfaces. In many designs, several glass or polymer elements work together. Their curved shapes bend incoming light toward a sensor or image guide. The result appears on a monitor as a magnified view.
The lens works with illumination, focus, and viewing angle. Tiny light sources brighten a dark cavity, while the lens controls how much of that scene reaches the camera. A wide-angle lens shows more area, but it may create edge distortion. A narrow-angle lens reveals finer details, though it requires more careful positioning. I have found that working distance matters just as much as resolution. A sharp lens can still produce a poor image when its tip touches fluid, tissue, or debris.
Choosing the best endoscope lens requires matching optical performance with the inspection task. Check resolution, depth of field, field of view, and resistance to cleaning chemicals. Lens windows should also tolerate repeated handling without clouding or scratching. Image quality is not determined by the lens alone. Lighting, sensor size, cable stability, and operator technique all influence what you see. A higher-resolution option is not automatically better. Sometimes it exposes details while reducing brightness, and that trade-off deserves testing before purchase. Thin lenses can improve access, but they may offer less optical flexibility. That limitation is easy to overlook.
An endoscope lens collects light from inside the body or a machine and focuses the image onto a camera sensor or image-transmission system. Numerical aperture indicates how much light the optical system can accept. The angles below are calculated using θ = arcsin(NA) for air, where NA is the numerical aperture and θ is the theoretical acceptance half-angle. A higher numerical aperture can improve brightness and light collection, but it may reduce depth of field and increase alignment sensitivity.
When choosing an endoscope lens, also consider field of view, working distance, image resolution, distortion, lens diameter, illumination wavelength, sterilization requirements, and compatibility with the camera sensor.
2026 How to Choose the Best Endoscope Lens?
Matching the lens to the inspection task matters more than choosing the highest resolution. A wide-angle lens helps locate cracks, corrosion, and missing parts inside large cavities. It shows more area, but small defects may appear less detailed. Use a close-up lens when inspecting weld pores, hairline fractures, or worn gear teeth. Keep the working distance stable. A few millimeters can change the image sharply.
For sidewalls, pipe bends, and hidden corners, a side-view or oblique lens can reveal surfaces that a forward lens misses. A forward-view lens remains practical for straight passages and general checks. In narrow tubes, lens diameter matters as much as viewing angle. A lens that cannot enter the passage is useless. Check the field of view, depth of field, lighting needs, and expected surface distance before selecting it.
Real inspections are rarely perfect. Oil, dust, and reflective metal can create misleading bright spots. I have seen operators mistake glare for a surface crack. Recheck the area from another angle and compare images at the same scale. Calibration targets can improve measurement confidence, although they do not remove every error. A sensible choice also considers articulation, image stability, and operator training. The most suitable lens is the one that produces dependable evidence for the specific inspection task.
Choosing the best endoscope lens begins with optical specifications, not housing appearance. Resolution shows fine edges, but it depends on sensor size, illumination, and focus stability. MTF is more useful than a pixel number alone. It describes contrast at different spatial frequencies. A lens with strong center detail may still blur near the image corners. Test both areas. Field of view controls how much anatomy or machinery fits inside one frame. A wide view helps navigation, yet it can increase distortion and reduce edge clarity.
Working distance affects focus and practical access. A lens designed for one distance may produce soft images elsewhere. Depth of field matters when surfaces move or inspection paths are uneven. Numerical aperture can improve light collection, but it may reduce depth of field. Chromatic aberration creates colored edges around bright metal or high-contrast details. Good correction keeps these fringes controlled. Coatings and lens alignment also influence contrast, flare, and color neutrality. In real inspections, a slightly lower-resolution lens can outperform a sharper design with poor lighting. This is easy to overlook. Sensor-lens matching deserves measurement, not assumption.
Tips: Compare images using the same sensor, light source, distance, and display. Check center and corner resolution. Inspect a fine grid, dark cavity, and reflective surface. Ask for distortion data and MTF curves. If specifications seem impressive, verify them under actual working conditions. I would not trust a single sample image; it may hide focus errors or aggressive processing.
How to Choose the Best Endoscope Lens?
During field inspections, I judge an endoscope lens by more than image sharpness. It must survive repeated handling, tight access points, and occasional contact with moisture. A reinforced housing helps, but it does not make the lens indestructible. Check the working temperature, impact resistance, sealing level, and cable strain protection before purchase. Small details matter.
Compatibility is equally important. Confirm the lens diameter, viewing angle, focal range, connector type, and lighting system. A lens may fit physically but still produce poor images with an unsuitable camera or processor. Test it on the actual equipment when possible. The screen should show clear edges, stable color, and enough detail at the required distance. Specifications can mislead.
Maintenance needs should match your working routine. Choose surfaces that tolerate approved cleaning methods, and inspect the optical window after every demanding use. Dust, dried fluid, and tiny scratches can reduce contrast quickly. Store the lens in a dry, padded case. Avoid forcing cables through sharp bends. I once underestimated storage conditions, and the resulting fogging delayed an inspection. That mistake changed my checklist. No checklist is perfect. Leave room for real-world wear, operator habits, and unexpected repairs. A dependable lens should also have accessible service guidance, replaceable protective parts, and clearly documented inspection intervals.
| Evaluation Dimension | What to Check | Practical Selection Guidance | Typical Evidence or Specification | Priority | Maintenance Impact |
|---|---|---|---|---|---|
| Optical Resolution | Image detail, edge definition, contrast, and performance at the intended working distance. | Select a lens that provides sufficient detail for the smallest feature to be inspected. Higher nominal resolution is not useful if illumination, sensor quality, or focus is inadequate. | Compare measured images using the same camera, lighting, distance, and display conditions. Review line-pair or resolution-chart results where available. | High | Keep optical surfaces clean; inspect for scratches, haze, and loss of contrast. |
| Field of View | The visible angle and amount of surrounding anatomy, machinery, or cavity area. | A wider field of view improves orientation and coverage; a narrower field may provide a more detailed view of a small target. Match the lens to the inspection task. | Common endoscope viewing angles include approximately 0°, 30°, 45°, and 70°. Confirm the actual angle and usable image circle before purchase. | High | Clean the objective window carefully because contamination is more noticeable across a wide field. |
| Working Distance and Focus | Distance from the lens to the target and the available depth of field. | Choose a fixed-focus lens when the inspection distance is stable. Choose an adjustable or appropriate close-focus design when the target distance changes significantly. | Verify the minimum and maximum usable focus distances with a real test target, not only with a catalog diagram. | High | Avoid forcing focus mechanisms and protect threads or adjustment rings from debris. |
| Mechanical Durability | Resistance to impact, vibration, bending, insertion force, and repeated handling. | For industrial use, prioritize a protected housing, secure lens retention, strain relief, and a design suitable for the expected insertion environment. | Request documented vibration, shock, insertion-cycle, or cable-flex testing relevant to the application. Check the smallest bend radius of the complete assembly. | High | Use protective caps, storage reels, and controlled insertion procedures; do not exceed the specified bend radius. |
| Sealing and Environmental Protection | Resistance to dust, moisture, immersion, chemicals, and temperature changes. | Select the required ingress protection level only after defining exposure conditions. A water-resistant lens is not automatically suitable for immersion or chemical contact. | Check the stated IP rating, operating temperature, storage temperature, immersion conditions, and chemical-compatibility limitations. | High | Dry the lens after use, inspect seals, and follow the approved cleaning-fluid list. |
| Optical Compatibility | Connection to the endoscope, relay optics, camera coupler, eyepiece, or imaging sensor. | Confirm thread type, mount geometry, flange distance, image-circle size, and mechanical clearance. A visually similar connector may still produce vignetting or focus loss. | Use a dimensioned mechanical drawing and perform a fit test with the exact endoscope and camera configuration. | High | Keep mating surfaces clean and use only approved adapters; avoid cross-threading. |
| Camera and Sensor Matching | Sensor format, pixel size, active area, sensitivity, and image-processing characteristics. | Match the lens image circle to the sensor. An undersized image circle causes dark corners, while an unsuitable lens may waste sensor area or reduce sharpness. | Test for vignetting, chromatic aberration, distortion, and corner sharpness at the intended resolution and frame rate. | High | Recheck alignment after changing cameras, couplers, or adapters. |
| Illumination Efficiency | Light transmission, illumination uniformity, glare, and compatibility with the light source. | Use a lens and light guide combination that produces even illumination without excessive hotspots. Highly reflective targets may require angled lighting or polarization. | Evaluate brightness uniformity, flare, and glare at the actual working distance and with the intended light source. | Medium–High | Clean light-guide interfaces and inspect for cracks, discoloration, or reduced transmission. |
| Chemical and Cleaning Compatibility | Resistance of coatings, adhesives, seals, and housing materials to approved cleaning agents. | Choose materials and coatings that tolerate the planned cleaning process. Never assume that compatibility with water implies compatibility with solvents or disinfectants. | Obtain a written chemical-compatibility list and follow concentration, contact-time, rinsing, and drying instructions. | High | Use lint-free materials and approved solutions; avoid abrasive powders and unverified solvents. |
| Sterilization or Disinfection Method | Whether the lens assembly supports the required cleaning, high-level disinfection, or sterilization process. | For medical applications, select only a configuration whose reprocessing instructions explicitly match the facility’s validated procedure. | Verify compatibility with the required method, temperature, pressure, exposure time, and number of reprocessing cycles. | Critical | Document each cycle and inspect seals, coatings, and image quality at scheduled intervals. |
| Temperature Performance | Operating and storage limits, thermal shock resistance, and focus shift with temperature. | Allow the lens to stabilize when moving between environments with a large temperature difference. Select a wider temperature range for outdoor, engine, or process inspections. | Check specified operating and storage ranges, then test image focus and sealing after the expected thermal transition. | Medium–High | Prevent condensation; store the lens dry and capped when it is not in use. |
| Distortion and Measurement Accuracy | Geometric distortion, scale accuracy, and suitability for dimensional inspection. | For measurement work, use a calibrated system and a lens with documented distortion performance. Do not use an uncalibrated visual lens for precise dimensional conclusions. | Validate against a certified reference target at the intended distance and field position; record calibration conditions. | High | Repeat calibration after impact, lens replacement, major temperature changes, or camera relocation. |
| Serviceability and Spare Parts | Availability of replacement windows, seals, adapters, cables, cleaning tools, and repair procedures. | Prefer a design with documented service procedures and replaceable wear components when downtime or contamination risk is costly. | Confirm spare-part availability, repair turnaround expectations, inspection intervals, and warranty terms before approval. | Medium–High | Maintain service records and replace damaged protective components promptly. |
| Routine Cleaning and Storage | Daily cleaning steps, drying requirements, storage temperature, and protection from dust or impact. | Choose a lens that can be cleaned consistently by the operating team without complex tools or excessive disassembly. | A practical procedure should cover pre-cleaning, approved solution, rinsing, drying, visual inspection, protective caps, and storage. | Medium–High | Clean after each use when exposed to residue; store in a padded, dry, dust-protected container. |
| Acceptance Testing Before Purchase | Whether the lens meets actual image, fit, environmental, and workflow requirements. | Run a documented trial using the intended endoscope, camera, light source, target materials, cleaning process, and operators. | Record focus range, field of view, image uniformity, distortion, connector fit, cleaning outcome, and any handling limitations. | Critical | Use the test results as the baseline for future preventive-maintenance inspections. |
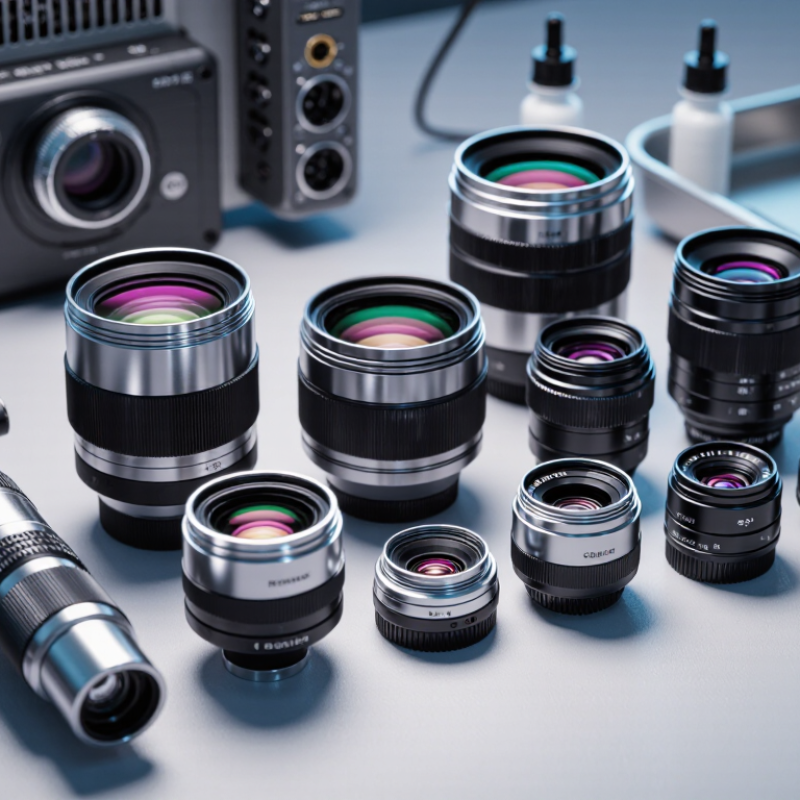
Choosing the best endoscope lens in 2026 requires comparison, not attractive specifications. A practical review should measure field of view, working distance, image resolution, distortion, and light transmission. A wider field of view shows more anatomy, but may reduce edge detail. A narrow view can reveal fine structures, yet demands steadier movement.
Industry demand is expanding. Fortune Business Insights estimated the global endoscopy devices market at about USD 47.9 billion in 2024. MarketsandMarkets also forecasts continued growth through 2028. More options do not guarantee better decisions. Compare lenses under the same camera, light source, and display conditions. Check sharpness at the center and edges. Record glare, color accuracy, and image delay. Repeated cleaning matters too. A lens that performs well once may degrade after many sterilization cycles. This is where specifications feel incomplete.
Tips: Build a simple scoring sheet. Give each lens a 1–5 score for clarity, angle, durability, cleaning compatibility, and cost. Test real instruments, not only samples. Ask clinicians to review blind images. Their feedback may challenge the engineer’s preferred choice. Verify compatibility with the existing scope, coupler, camera, and reprocessing method. Confirm service support and documented quality testing. The final choice should fit the procedure, not merely win a laboratory comparison. I would also leave room for uncertainty; user handling can change results more than expected.